So here is the Before:
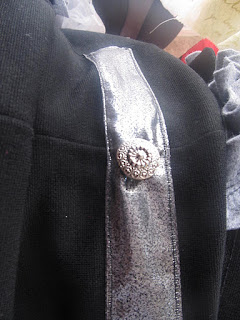
And here is the After (front, then back):
I had SO MUCH fun doing this project so I thought I would share a how-to!
What you need for this project:
1/2 yard felt
coordinating thread
scissors
pins
1. I chose to use felt because it is a beautiful material that does not ravel and does not need to have the ends finished. Felt is sold by the bolt in fabric stores just like other materials. Using a wave pattern, cut the felt approximately 3 inches wide. It does not have to be exact.
2. We are now going to gather the long length of waved fabric for the long ruffles on the lapel. Using a 4-5 stitch length, sew down the middle of the felt. Then go back and sew a parallel line next to the stitches you just made. Using the bottom two strings, very slowly begin to pull to gather the entire length of the felt as tightly as it will go.
3. When it is all gathered, fit it to the length of the lapel and pin to it. You may have to loosen it a bit to fit the entire length of the jacket.
4. With a smaller stitch length, sew down the entire length of the jacket until it is in place and remove the pins. Then go back and remove the gathering stitches with a seam ripper. Repeat for the other side.
5. To make the sleeves, you will cut the felt with a wave pattern on one side, and a straight line on the other, approximately 3 inches in width.
6. Using the same gathering method mentioned above, gather the sleeves. Then pin in place on the sleeves. Cut off the excess material. Slowly sew to the garment sleeves. Once the ruffles are sewn on the sleeves, you will want to sew another layer about an inch or so above the bottom of the sleeve. This keeps the inside material pinned down so it does not flip out when you wear it. Sew the 2 open ends together.
7. Lastly, I wanted to embellish the back, so I used some silver ribbon. Simply lay it in place and sew down each side. I then added 2 buttons to the back!
That's it! I will definitely wear this blazer now :)


No comments:
Post a Comment