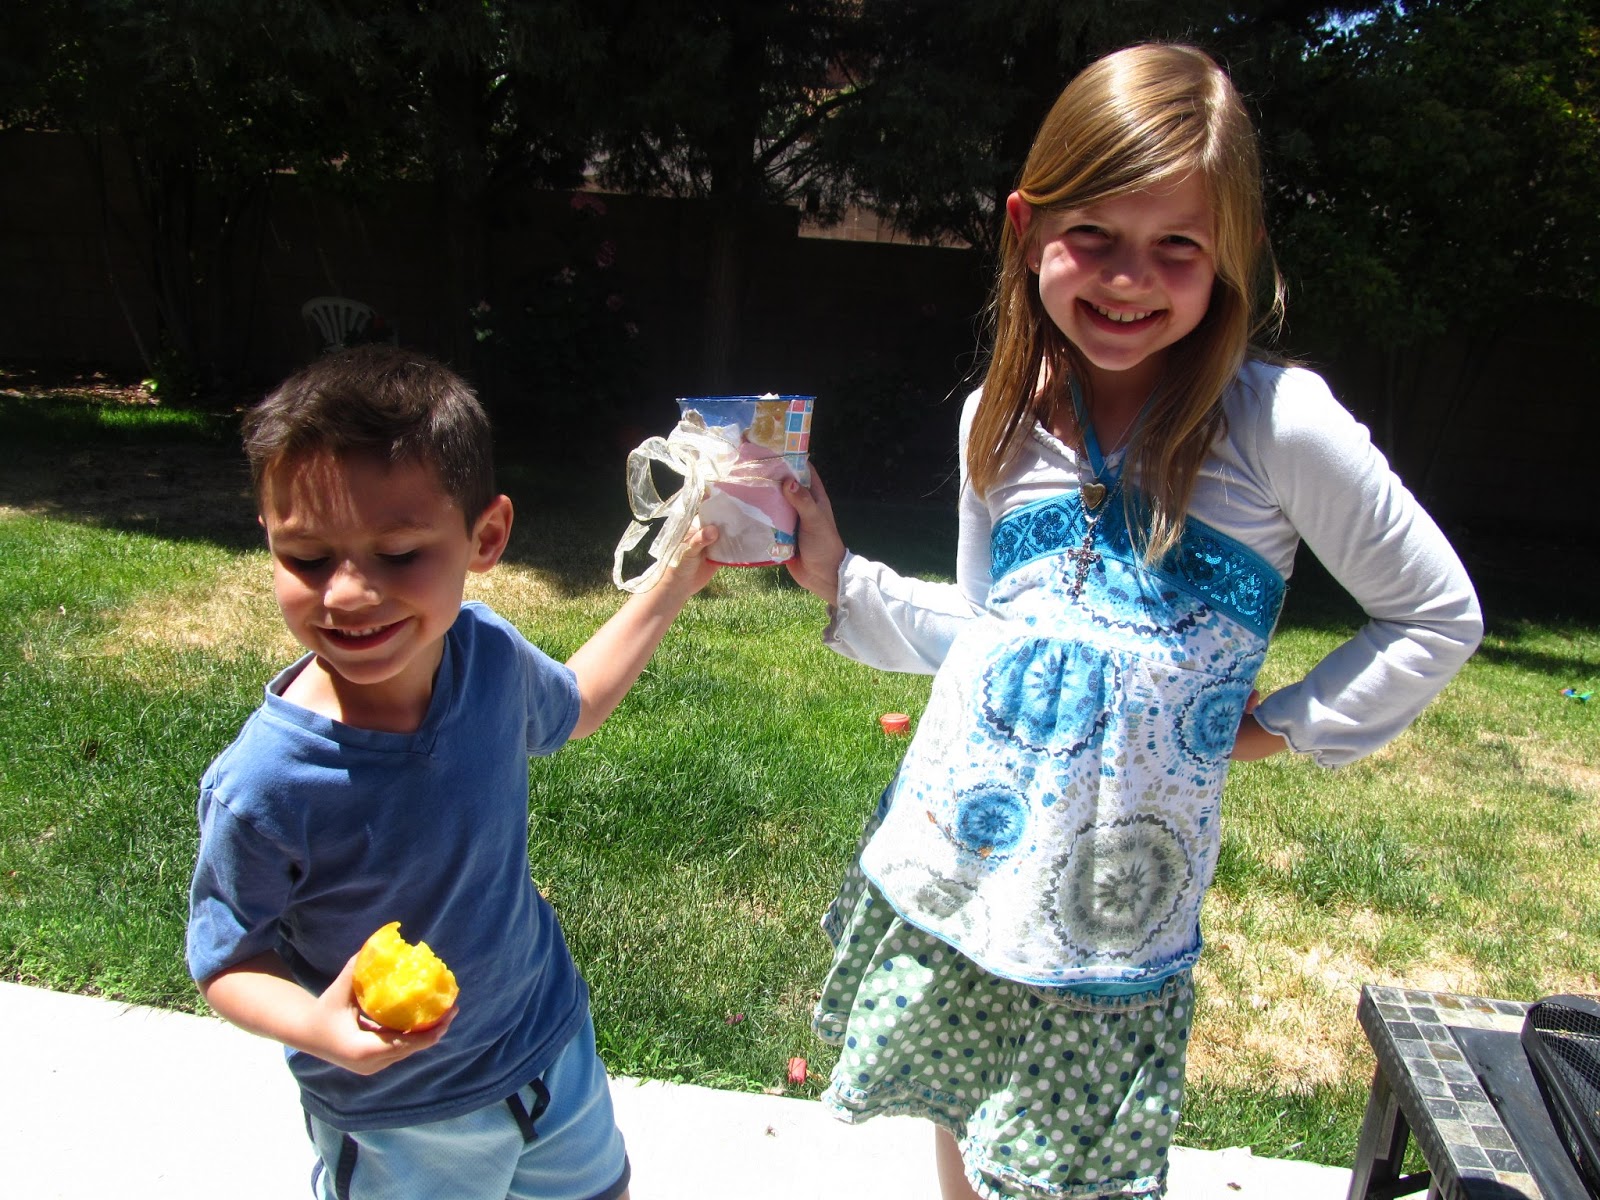
My presents

My presents
Showing posts with label Crafts. Show all posts

Friday, January 23, 2015

Life....

.....has gotten in the way of my blog. I like that. I like that life has made my screen-time diminish. I like that my time has been spent in meetings for school... making healthy recipes... typing up papers for fifth graders who waited until the last minute... cutting coupons...laundry upon laundry, upon laundry.....my sewing business....making endless towers then having my boys crash them down.....organizing my home.......doctors and dentist appointments......the exciting....and the mundane. That is as it should be. I don't apologize for that. But, I know that I have been missing this little outlet of creativity.

I once again recently discovered my other on-line love.....PINTEREST. I have to be careful with this site because it has the potential to eat up all of my time. On there I pin things that I LOVE. I pin projects I want to do, and recipes I want to try. I get really great ideas from other women who think like me. I even pin things that make me laugh like a little girl, just because they brightened my day a little bit. I DO do a lot of the things that I pin.....ie. my "pinteresting summer" series that I have done for 2 years now. But, I don't do nearly enough of what I pin and I REALLY want to! There are too many wonderful, fantastic ideas that just sit out in cyber-space, pinned on Rebekah Lynn's boards, categorized so nicely and then just remain there for all of time.

So, I have made a REALLY FUN pact with myself. I would LOVE to do at least ONE new Pinterest project, recipe or idea per week. Just one a week.....I am not going to go in any kind of an order or make this too complicated. I am just going to do it because it will be fun and I think that it has the potential to enrich my life and the life of my precious people.

I began with need. One thing that I NEED is a good wallet system and I had not found one yet. I have the cash organizers that I make and sell on my site (check them out HERE!) but I have TONS of cards that I need to carry as well and my old wallet recently broke. Because I love to carry things that I have made, I really wanted to find a pattern that I love.....which is where Pinterest come in oh, so handy :) I did find an fantastic tutorial HERE at Infarrantly Creative. (I will definitely be giving credit where credit is due as I blog about my different Pinterest ideas!). I am not done yet......but here is a preview. Because it is almost midnight (go to BED, Rebekah!), I think I better put this project to bed, and head there myself. Can't wait to finish this up tomorrow!


Wednesday, May 28, 2014

Summer Journals

This is the second year that we have done journals for summer, but this is the first year that my son has gotten to participate! This is a way to keep education in the background so they do not forget absolutely EVERYTHING they learned the previous year in school!

Last year we decorated a plain black composition book. (See post HERE). But this year, I decided it would be fun to make our own....and I loved the result!


To make a journal this year, I printed out the 2 titles and put together about 15 pages of white copy paper. Using my sewing machine, I simply sewed down the center and folded in half. The result is GREAT! The kids then used stamps and markers to make their journals their own, which was today's activity......and also made their first journal entry. It will end up being a great reminder of what we did this summer, as well as helping them work on penmanship and creativity.


Ellie is 10 and going into the 5th grade. Tyler is 5 and headed into year 2 of kindergarten. So, they approach the journals differently. Ellie is going to actually write, using cursive (something no longer being taught regularly in public schools, but we want her to be able to do it well). For Tyler, I made lines like the lines he is used to writing on, on the bottoms for him to write a sentence. Then he draws a picture above his sentence of what he talked about. This is a great way for kids of ALL ages to record their summer memories!


Quick Note: I must have heard from my middle child "This is the best day I have ever had" at least 5 times. Today was nothing special in my opinion, just a day that I had planned out with things the kiddos would enjoy. I think that if we keep them in mind, it will keep us sane and allow our kids to do more than laze around the house and waste their summers doing nothing. We are off to a great start!


Thursday, June 6, 2013

Bust that Boredom Away!

It has become an annual tradition now: to make a boredom buster jar. The day you make it, is a boredom buster in and of itself....and then you have something to send the kids to when they ARE actually lacking in creativity to figure out what they want to do!

*Just a note that in almost all of these "Pinterest-ing Summer" blog posts, my youngest, Trenton is not pictured. The reason for that is that he is sleeping when we do a lot of our fun activities. It is the way it is.....by next summer he will be able to participate in more :)

We began with a brainstorming session laying on the trusty hammock. We were armed with paper, camera, pepsi and cute people. We began to brainstorm everything we could think of to do if we get bored. I wanted to come up with 100 ideas.....and we landed on about 85, so I was pretty happy with that! These ideas will then be cut out, folded and put in our boredom buster jar!


After our brainstorming session we then went to the second phase of our boredom buster jar-making....decorating the actual jar! We decided this year to mod-podge a small bucket that I had lying around....using my HUGE stash of scrap book paper. We tore bits of paper, then each person got a chance to stick it on the bucket. *Mod Podge is great for so many reasons: 1. you can't really mess it up 2. It is messy but easily cleaned up 3. kids love it 4. there are not ENDS to what you can do with this product! Just use it like glue, then when you have your paper stuck down, you actually paint with the mod podge right on top of it!


Allow to dry. While you are doing that, you can cut out all of your amazing ideas and fold them all. In the time it takes to do that your mod podge project should be done. Here is what we came up with. Here is to the BANISHMENT of those 3 little words we all dread hearing:
"MOM, I'M BORED!"


P.S. My kids are so excited now that they actually ARE saying those words....because they want to pick from the jar :) My son is currently brushing the dog's hair, while my daughter is playing a wii game :)


Tuesday, June 4, 2013

The Great Blue Experiment!

What happens when you add elmers glue, almost an entire bottle of blue food coloring (thanks to an excited 4 year old boy), water and borax? BLUE FLUBBER that also dyes your hands blue for seemingly ever :)


So, I began with THIS recipe for Flubber!

I made a mistake by buying the small jar of Elmer's glue at our Hobby Lobby outing this week so I had to smudge the directions a bit. Add that to an excitable little 4 year old who added WAY too much food coloring and we had a bit of a mess....but I have to say that this mess created MUCH fun for a LONG time on this summer afternoon! If you had the correct proportions of everything, I think this would be an AWESOME and fun little science experiment! I highly recommend this!

On another note, like my new bowl I got for $1? I just adore garage sales!

Monday, June 3, 2013

Tub Paint!

  • Time for a guest blogger...my sister, Rachel! She is a very creative, stay-at-home mommy and she is also trying some "pinterest-ing" ideas this summer! Check out her latest project. I can't wait to try it with my boys! They will LOVE it!


     I am a stay at home mom and my husband just deployed again... he is gone 6 months out of the year! I have to do things to keep my almost 3 year old happy and busy. He has always loved bath time but has been getting bored with the same old toys. I wanted to share with you the most EASY recipe for fun ever! You could use this as side walk paint as well. Recipe on my photo. It stirs up really easily and can be saved for numerous bath times. My son loved it! It does drip down the walls after a couple of minutes, but most of the color stays in place and will not stain. Just rinse off when done. Because it's made with bath soap, they are getting clean in the process. No complaints there! The thicker the paint, the less it will drip, so just play around with how much cornstarch you use.
  • TIP: use an ice cube tray or , if you don't have one, put small containers inside of a plastic bin that floats in the tub

Friday, May 31, 2013

Memorial Day Door!

A recent boring day, lead me to my favorite site on the entire world wide web: Pinterest! I was feeling very "crafty" but not too ambitious and not extremely creative. So, I began to just look through all the hundreds of pins I have already pinned onto Pinterest. I was looking for something I could do for my home that was 1. summery 2. easy 3. uses materials that I already have on hand and 4. can be completed in a short amount of time.

I settled upon this adorable website that showed a beautiful star wreath for the front door: Here is the original link if anyone would like to go there....I want to go on record of that that for my "Pinteresting Summer" blog series, I am always going to show you the original link. Most ideas are not mine, but are taken from or adapted from other, more creative people! STAR WREATH!!

So, without further ado, here is the wreath that I made for my front door. I think it turned out very cute, only took me about 45 minutes to complete and is perfect for both Memorial Day or July 4th!


For this project, you only need the following materials:

cute paper (ie. scrapbook paper)
hot glue
ribbon
cardboard (for the backing)

1. Go on the internet and search "star template" on google. When you have the size that you desire, print it out and use it as your template.

2. Trace your star template onto 12 pieces of paper. I used 6 different papers and did 2 stars of each.

3. Once you have your stars cut out, you begin to fold them 3 dimentionally. This seems intimidating but is really only time-consuming. You fold a crease down each point stopping at the middle. Then you take 2 adjacent points and fold them the opposite direction in the space between the 2 points. Once you do it, it makes sense, I promise!

4. Cut out a template of a wreath from a piece of cardboard. Make it look like a skinny donut.

5. Then just simply arrange all the stars, and use hot glue to glue down the points. Do not skimp on the glue. 

6. Attach a ribbon loop to the back and there you have it...a very festive and cute wreath for your door or mantle. I plan on doing this again in new colors....perhaps Christmas time :)

Friday, June 1, 2012

Another fun art project!

Coloring can get boring......but NOT when you do cool projects like this! I got this tutorial from pinterest and HERE IT IS.

All you need is crayons and paper! I am all about the easy, crafty ideas that keep the 8 year old occupied while the 3 and 1 year old are napping!


Summer Journal!

We all want to keep education as a priority over the summer but it doesn't really happen all the time! But, one fun way to keep education at the forefront is to teach kids to journal!

We did this activity yesterday during nap time for Ellie my 8 year old. I bought a plain composition book like the kind she uses at school for $1.99. Then I pulled out all my old scrapbook paper, stickers, glitter and glue and let her have at it! This activity took her about an hour to complete and she LOVED making it her own.

Allow kids to go crazy and decorate the book however THEY want it to. When she was done gluing down all the random pieces of paper we then made a front label that she filled out that said "Ellie's Summer Journal."

Allow the glue to dry a few hours then cover it with clear contact paper. Now your child has a unique journal for the summer.....this encouraged creativity and helps writing skills for those budding writers!


Friday, May 25, 2012

Thanks-a-Latte

The end of the school-year is upon us....and with it comes appreciation of the teachers, bus drivers, Sunday School workers, cafeteria aids and others who build into our kids lives.  Thanks to Pinterest, I had a plethera of teacher-gifts at my disposal. I just had to come up with something that fit my personality well. I wanted something hand-made and expressive of the appreciation that I have for the countless hours that have been spent teaching and being a friend to my two oldest children.

I decided on two gifts (because I basically could not decide on one!) Since they turned out so well, I thought I would blog about them for you.

What I decided upon was THIS apple dip set (because an apple for a teacher....so appropriate), and THIS coffee cozie. I changed this one up a bit to make it more "mine" and the end result was very precious. These two were definitely gifts that I would have loved recieving from anyone!

The apple dip was great and made a beautiful presentation. You start with caramel dip that you can find at any store in the fruit section. You mix some cream cheese with it (no measuring.....pretty much any dip with cream cheese tastes so YUMMY). I bought half-sized mason jars at my favorite store for $1.50 each (Hobby Lobby tip: If you go to Hobbylobby.com you can print out a 40% off coupon EVERY DAY on a non-sale item. I save money every time I go!). Fill it half-way with the caramel/cream cheese dip. The other half you layer with the regular caramel dip. Then you crush up some candies to add to the top. The original recipe called for Heath bars but I could not find those so i used Grand Bars. Screw the top on and put an apple on top. Then put it in a clear bag (which I also got for cheap at H. L. and tie with a nice ribbon and yarn combined. I am telling you.....adorable presentation. So sorry but I do not have pictures of this. Bad blogger that I am!

The second project is a scrap-buster, which I am all about. It takes about 10 minutes of sewing time and is ADORABLE.


1. First, you must buy yourself a drink from Starbucks. I know. This part is difficult :) But, you need the drink to get the template of the cardboard coffee sleeve. Take the sleeve apart and trace it onto fabric of your choice, and reinforcement of your choice. Trace it about 1/2 inch larger all the way around, and cut it out.

2. Pin the layers together like this: Reinforcer, then both materials, right sides together. Between the right sides you will lay a piece of elastic (I used a hair tie) facing inward with just about 1/2 inch sandwiched out. Sew all the way around, except for one of the short sides.

3. Clip the corners as well as along the curve so it will lay nicely, then turn it right-side-out, taking car with the corners. Iron down and then fold in the raw, open side about half an inch. Iron down. Do a nice top stich all the way around (for a tutorial on top-stitching, check out this blog entry).

4. You can be done at this point or you can do some quilting all over the top of it. I chose to do my favorite technique, freestyle quilting. (Check out my entry of this technique HERE).

5. Place it over your Starbucks cup to figure out where to sew on the button. Sew a cute coordinating button in place and that is it!

For cut presentation I went to S.B. and bought a gift card and also picked up 2 empty cups (without lids). I put the cozy on the outside and the gift card on the inside along with a card that said "Thanks a Latte." Ellie then wrote in each card. Adorable.

What teacher gifts have you done? Hope you enjoy these two ideas as much as I did!!!

Wednesday, February 1, 2012

Blazer Redo Tutorial

I have had this really boring, really plain blazer hanging in my closet for a long time. In all of my closet purges, for some reason it remained......but I never wear it. So, I decided that instead of letting it just sit there, not being worn, I would embellish it to make it more fun!

So here is the Before:


And here is the After (front, then back):


I had SO MUCH fun doing this project so I thought I would share a how-to!

What you need for this project:

1/2 yard felt
coordinating thread
scissors
pins

1. I chose to use felt because it is a beautiful material that does not ravel and does not need to have the ends finished. Felt is sold by the bolt in fabric stores just like other materials. Using a wave pattern, cut the felt approximately 3 inches wide. It does not have to be exact.


2. We are now going to gather the long length of waved fabric for the long ruffles on the lapel. Using a 4-5 stitch length, sew down the middle of the felt. Then go back and sew a parallel line next to the stitches you just made. Using the bottom two strings, very slowly begin to pull to gather the entire length of the felt as tightly as it will go.


3. When it is all gathered, fit it to the length of the lapel and pin to it. You may have to loosen it a bit to fit the entire length of the jacket.


4. With a smaller stitch length, sew down the entire length of the jacket until it is in place and remove the pins. Then go back and remove the gathering stitches with a seam ripper. Repeat for the other side.

5. To make the sleeves, you will cut the felt with a wave pattern on one side, and a straight line on the other, approximately 3 inches in width.


6. Using the same gathering method mentioned above, gather the sleeves. Then pin in place on the sleeves. Cut off the excess material. Slowly sew to the garment sleeves. Once the ruffles are sewn on the sleeves, you will want to sew another layer about an inch or so above the bottom of the sleeve. This keeps the inside material pinned down so it does not flip out when you wear it. Sew the 2 open ends together.


7. Lastly, I wanted to embellish the back, so I used some silver ribbon. Simply lay it in place and sew down each side. I then added 2 buttons to the back!


That's it! I will definitely wear this blazer now :)

Monday, January 30, 2012

Tip-Me Monday- Galaxy Dough...cleaning up spilled glitter!

I have never made play dough before. But, after our experience this morning, I am inclined to do it again....and again!


Because of lovely, lovely pinterest, I found THIS site that explains how to make "Galaxy Dough."

I did not have all of the ingredients, including the cream of tartar....so I added some cinnamon to make it smell good and some baking soda. I was just experimenting. Even with my substitutions, the play dough turned out wonderful and we spent a very fun 2 hours making the dough and then playing with it.


I have a craft bin underneath my bed.....and about a year ago, some glitter had broken open and now lines the inside of my bin. Well, the galaxy dough calls for glitter because it adds sparkle to the dough! Why had I never before thought of cleaning up the glitter with playdough? Every kid would love to add sparkles to playdough! So, a year's worth of glitter was cleaned up in 5 minutes!


*Side note: These priceless moments of doing something fun with my kids do not happen nearly enough in my house. I put aside my cleaning, laundry and grocery list making and devoted uninterrupted time to my boys this morning. On more than one occasion Tyler said "thank you, mom." He was thrilled the WHOLE time. I learned a lesson this morning that I should have learned before. My kids need play time. They need mommy to put aside work and to leave the house messy....for them. So today, my kitchen looks like this:


and my boys look like this:


It's worth the mess!

Thursday, January 26, 2012

Crafty Thursday: The amazing Top Stitch


As you know, I LOVE to sew :) Did you know that? Haha!

Almost all projects that I do require a topstitch and for the longest time, I never could figure out how to do that. It is so simple but I truly did not understand it. Now I do so I wanted to share the wealth :)

Some of my sewing instruction, believe it or not, has come from Nancy Zieman, who has a TV show on Saturday mornings on PBS. She is very clear and relevant in her delivery about basic sewing, along with more advanced techniques.

One thing that frustrates me about her (and other sewing shows), however, is that they have REALLY expensive sewing machines that do EVERYTHING and a sewing foot for the machine for absolutely everything you would ever want to do. In a recent episode on her show she showed how to top-stitch and I did not even realize there is actually a top-stitching foot for the machine! But, I am here to tell you that you do not NEED a top-stitching foot.....or even a really expensive machine to sew well! Now of course, SOMEDAY when I have oodles of money *(haha), I would like both an expensive surger and a nice computerized embroidery machine......but until then I can fake it on a lot of things and they turn out just as nicely!

All top-stitching is, is a line of stitches that are on the top of a piece of fabric. They hold the 2 pieces down once they are sewn together from the inside and they make it both more sturdy, and more decorative.

I am going to show you how to do this with a regular and not a top-stitching foot :)

In this project, I was working on straps for the casserole carrier that I have been making. They are wonderful, by the way. I have used mine several times and wondered how I lived without it for this long :)

First of all, here is what the strap looks like without a top stitch. It is sewn together from the inside and then turned inside-out:


The first thing you need to do, is pin it down. To get the pinning done precisely is very simple. You take the pin and go in at a 90 degree angle to the fabric facing away from you, then turn it down so it is flush with your fabric. (Like my Angry Birds band-aid? :)


Then you simply sew a straight stitch, sew at about a 2.5 length along the length of the seam. The feed dogs will feed your fabric through, but I like to help it along by SLIGHTLY pulling on the fabric from the opposite end. Keep the needle as close to the seam as possible. (Apparently if you have the fancy foot it has a guide that keeps it even for you).


Remove the pins and that is it! Now look how pretty the straps are!

Thursday, January 12, 2012

Thursday Crafts: Freestyle Quilting!

My latest and greatest crafting love is freestyle quilting! When one quilts, there are TONS of techniques out there. You can quilt "in the ditch" which is next to the seam line that you have sewn. You can do grid patterns and curve patterns. You can use a template, make it up yourself etc. But, my favorite way to quilt on projects that I do is doing the freestyle method.


What I love about this is that it makes ordinary pieces look expensive and like you have put a lot of time into it! Lately, I have been making some casserole covers/carriers for both friends and myself. I started with the tutorial that I found HERE. I changed it up a bit including the quilting portion of it and have been seriously enjoying myself WAY too much with freestyle quilting :) Here's 2 covers I have made. The first was made from leftover material from some couch cushions that I made years ago. The second I bought the material for my friend who asked for purple, green and paisley!


Quilting can be intimidating. It surely was for me. But, I am here to tell you that the way that I freestyle quilt is so EASY and so fun too! I am such a nerd about it. Haha!

I will show you a couple pictures on this material because it is fairly good contrast to see the stitches.

If you are working with a fairly small material piece, you will not need to pin all the layers together. In my case the 2 pieces to the casserole carrier were already sewn on the edges with a top-stitch, so I did not need to pin the rest of the pieces together. If you are working with a larger piece like a blanket or wall-hanging, however, you will want to place pins approximately every 2 inches in a grid over the entire work so that it will not buckle as you sew.

Turn your piece to the side that has the most contrast with your thread so you can see your stitches clearly. In my case, that was the back of the piece. Once your piece is pinned (if applicable), begin on one side and begin to sew with the machine set to small stitches (I have mine at a "2"). Work slowly and begin slowly rotating the piece of material so that you are making even, curved lines over the entire piece. Try to guide the material evenly as you work. I have found that if I stop the machine to readjust the material, the lines will not have an even curve. So, it is best to not stop the machine. Using "S" patterns and squiggly lines over the entire piece, it begins to come together! Begin to cross lines and continue rotating the work until you have stitches over the entire piece.


This best thing about this technique is that it looks better and better the more sewing you do. I don't know if you can sew "too much" in freestyle quilting! It can be a bit time-consuming, but I promise that in the end, you will be very satisfied with your work! It can look something like this when you are finished.....or it can look very different. There is much freedom.....and I LOVE that!


If you have never tried this technique, try it! It may take a bit for you to feel comfortable with machine quilting, but if you like to sew at all, I think you will like it! Let me know if you give it a try!

Thursday, January 5, 2012

Crafting Day!

Thursdays will be crafting days to me.....sewing, easy crafts, organization etc! If I complete any projects using other websites, I will definitely give them credit here as well. Like so many others, I have a pinterest addiction. The good thing is, I have gotten to actually complete many of the projects on my boards and I love that!

So today, I will show you my craft space. I don't have the most organized space and a lot of that is due to the fact that I don't have much money to spare. I have a "Craft Area" board on my pinterest with different craft rooms and organizational ideas that make me SWOON. But, lots of those ideas require more money than I can dole out to my hobby just yet!

I have been trying to figure out my favorite hobby for about 10 years, since I got married. I tried my hand at knitting, crocheting, card making, stamping, quilting and scrapbooking.......then I discovered the sewing machine and I am hooked!

Really this is a sewing room now that also houses my other hobby.....the computer :) In this room, I am able to display my beautiful antique White sewing machine from the 1940's. It is worth just about nothing in monetary value.....but to me it is a piece of beauty. It reminds me of days past and I think of the woman or women who sewed on this very machine. I have been waiting to pull it out. Now it is proudly displayed in my sewing room!


The largest part of my disorganization was all of my fabric scraps. When you have sewn for a while, you begin quite a collection. I have recently been finding great fabric busters on pinterest and it was been wonderful, but I had to figure out something other than everything just stuffed in a box. I have heard wonderful things about cardboard fabric organizers, but I honestly did not want to put that much time into it. So, I began to sort....throw out.....and put into categories based on colors and types of material. I really only had cotton blends, a few faux furs, flannel, some felt, some fleece and some heavy weight material. Looks like a lot more than that! ;)


Once I got rid of the scraps that were too small to be worth the space, I folded everything into a smaller size and put them in clear containers so that I could see them. EVENTUALLY I will get those dividers and fold all my fabric around it....someday :)


Then I moved the bookcase area to my idea boards. I LOVE having idea boards up. They are simply cork-boards painted the same color as the walls.....they came with the house. PERFECT!


Now I feel so much more at peace as I look out the window and sew to my heart's content!


Likely you are not drooling over my craft space like I do on the pinterest craft rooms. But, it is a start.....and I LOVE it!